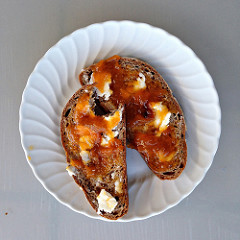
 When I was growing up I was fortunate enough to have a mother who really cared about “healthy” food. She wasn’t quite what one might today call a health-nut, but the bookshelves featured Adelle Davis and John Yudkin, and her baking featured plenty of wholemeal flour. The bread, in particular, was a leaden brown brick, far better toasted than fresh, tasty and filling and quite a lot of work to chew. I remember too a batch of homemade blackberry jam, made with brown sugar, probably Muscovado rather than Demerara, which was always under suspicion of being white dyed a bit brown. That jam set so solid it needed brute force to prise it from the jar. It had to be sliced, rather than spread, but sliced onto that bread, made the chewing worthwhile.
The other thing about the bread was that it was easy as pie; just roughly mix flour, water and yeast with some salt and sugar, pour the resulting goop into greased tins and by the time the oven was hot it had risen a bit and was ready to be baked. This was the famous Grant loaf, perfected and made famous by Doris Grant, another pioneering health-food nut, who as it happened lived to be 98. The Grant loaf was pretty popular, and I’d be lying if I said I didn’t enjoy it. I even made it myself a few times, back then, but I also think it was those loaves that started me baking my own bread, for no other reason than to have something else under my peanut butter and sliced jam.
The Smithsonian article set me thinking. First, was the Grant loaf as simple as I remembered it? Yes; although one of the recipes I found suggested sieving out the bran. Huh? The same recipe said to make it half and half with white flour. Huh? squared. But then, all Hamelman’s recipes for wholemeal breads seemed to call for half and half. Elizabeth David had a few versions of Doris Grant’s own recipe, and so did Saint Delia, and all of them seemed to ask a lot of yeast to do its work in a little time.
I can do better than that, I thought, making use of what I’ve learned in the past few years. So I had a go, using a natural leaven not commercial yeast. And it worked. Beyond my craziest expectations.
Ingredients
350 gm ripe wholemeal leaven at 75% hydration
800 gm strong wholemeal flour
700 gm water
17 gm salt
Method
Prepare your leaven by feeding your starter with 200 gm of wholemeal flour and 150 gm of water. As it happens I keep two starters going, one a 75% wholemeal starter, the other a 100% white starter, and I used the brown, but I don’t think it matters much what your starter is. Allow to ripen for 12 hours or so.

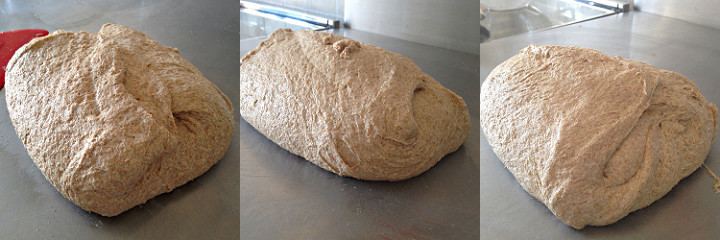
Weigh the leaven into a large bowl, add 700 gm of water and stir about a bit to break up the leaven. Add the salt and the flour. I added the flour in three batches, two of 300 gm and one of 200 gm, stirring well after each batch to make sure all the flour was fully wetted. At this stage the dough is very soft, pretty sticky, and has very little structure. Don’t worry. Turn the dough onto a work surface and do a couple of stretch and folds. The S&F technique is much harder to describe than to do, and every time I do it my hands are too messy to use my camera, but my bread-making friend Dan had some good pics on his site. In essence, and usually with the help of a scraper to start, you pull the dough out to one side and fold it back to the middle. Then the other side. Then backwards, and finally forwards. You end up with a parcel of dough, which even after the first four stretch and folds is way more structured than it was when you began. I do this twice, for what I call one set of stretch and folds.
Return the parcel of dough to the bowl, cover, and allow to ferment for 30 minutes. Turn it out, do another set of stretch and folds, and return to the bowl for another 30 minutes. Feel that structure building up? Return to the bowl, this time for an hour before another set of stretch and folds.

Stretch and fold after 30, 60 and 120 minutes
To recap, you S&F immediately after mixing, and then after 30 minutes, one hour and two hours. My notes say:
- 9:15 Holding shape.
- 9:35 Stiff, holding shape.
- 9:50 Really elastic, 2nd fold hard to stretch.
- 11:00 Well structured, still a bit sticky, into fridge.
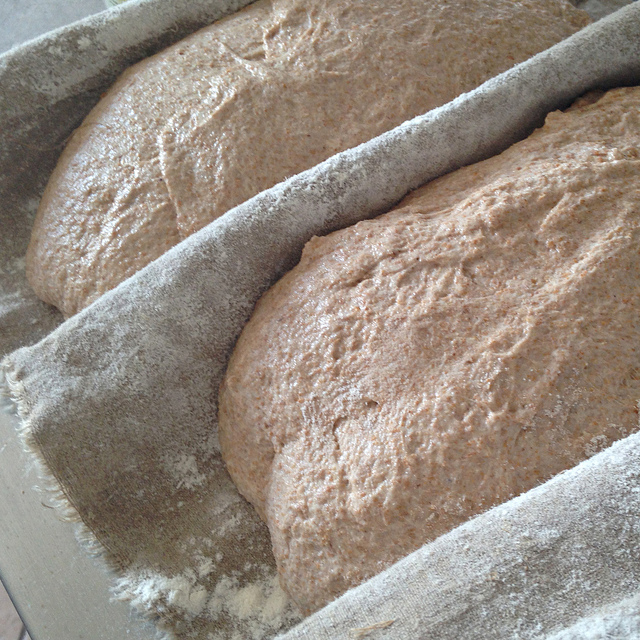
Put the bowl in a plastic bag and put it in the fridge to continue its slow fermentation. I left it in the fridge for 3 hours, but 6 or even overnight would probably be fine. The dough had risen well, easily doubling in volume. Bring the dough out and allow it to warm up for about an hour. Gently scrape the dough out onto the counter and do a gentle stretch and fold. At this stage, handling needs top be very light as you don’t want to get rid of all the gas and bubbles that have formed. Divide the dough parcel in two and shape each as you prefer. I formed batard shaped loaves and put them into a well-floured couche to rise for another hour. That may have been a mistake. The loaves are still very soft, and hard to handle; a banetton or tin might have made life easier.

Preheat the oven to 230°C and prepare for steam too. Gently, again, turn the loaves onto a piece of baking parchment, slash to suit, and slide the parchment onto a tray or baking stone in the oven. Bake for 30 minutes, at the end of which remove the source of steam, turn the loaves and reduce the heat to 210°C and bake for another 20 minutes. Test that the bread is done (hollow knocking sound, or internal temperature around 95°C) and if it is turn the oven off and leave the loaves in there for another 5–10 minutes with the door slightly ajar. Cool the bread on a rack and, if you can, wait until thoroughly cool before slicing.
The result? As I said, beyond expectations. This bread is light, the interior soft and open, but not too open, the crust crunchy but not too thick. And the taste has the nuttiness of wholemeal and that interesting sweetness, without any added sugars. A greater contrast with the Grant loaves of my youth I cannot imagine, and yet it was those loaves that made me able to bake this one. Hard to bake? I suppose so, but not really, given a bit of experience. Worth repeating? For sure.
And there’s a set of the images here, if you’re interested.