Some praise yesterday for my sourdough bagels made me realise that I had never shared the recipe here. Very remiss of me, so here goes.

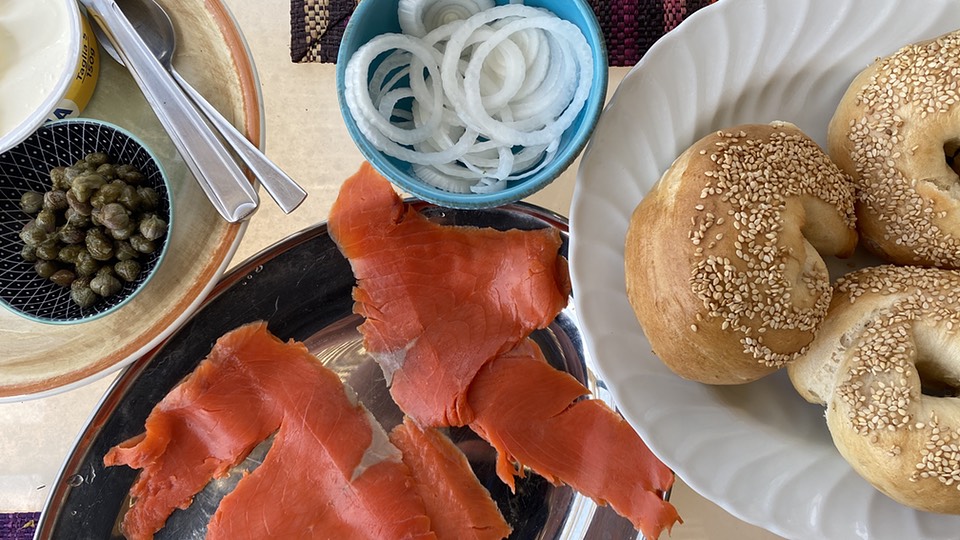
Lunchtime bagels with smoked salmon, onions, capers and cream cheese

Lunchtime bagels with smoked salmon, onions, capers and cream cheese.

The point about bagels, and this I have noted before, is that like ciabatta, the ones you can easily buy are bagels in name alone. For a dense, chewy bagel with a nice shiny crust, you have to make your own, especially if you live in Rome. My recipe is based on one I found 10 years ago in The Fresh Loaf, an invaluable resource for bakers of all stripes. That thread is still going strong, by the way, as people want to make bagels in the time of Covid, which is exactly what I was doing.

So, to business. I’ve made the recipe with yeast, and I also converted it to sourdough, which is what I’ll share here. It is actually very fast, a couple of hours from start to finish, but you could probably do an overnight bulk rise in the fridge if you prefer. I like to start in the morning so that there are fresh bagels for lunch.

Let me note too, that there is no hint of sourness about them. If anything, they are slightly sweet, and note that there is no salt in the recipe.

Ingredients (for 12–13 bagels)

200 gm ripe starter at 100% hydration
360 gm water
40 gm white sugar
9 gm malt powder (probably optional)
1 egg
10–15 ml olive oil
900 gm strong white flour
2 heaped tablespoons brown sugar
Seeds (sesame, poppy, etc all optional)

Method

Build your leaven using your preferred method so that you will have 200 gm of ripe leaven when you plan to bake. My starter is currently good and active, so I just did one build the night before, but you may want to do two builds.

Mix the starter with the water, olive oil, egg, sugar and malt powder. Add the strong flour, mix it up a bit in the bowl and tip it all out onto the counter. At this stage the dough is very dry and there is spare flour everywhere. You are going to have to work hard for 15 minutes to get all the flour incorporated into a very stiff dough. Set your timer, plant your feet firmly and get going on the kneading, using your entire upper body to press, fold and turn, press, fold and turn. The dough will, I promise, come together and will eventually feel alive under your hands.
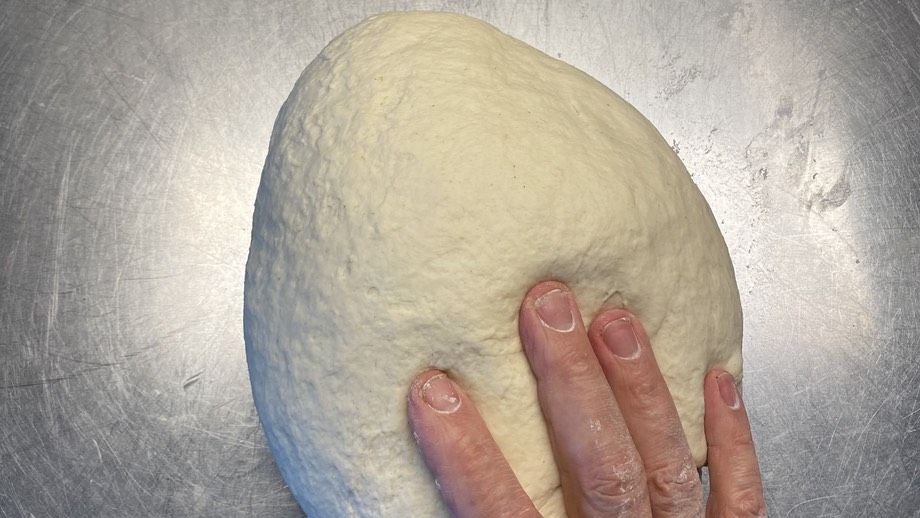
Bagel dough with a hand for scale

Bagel dough is stiff and hard work, but ultimately rewarding. This is double the quantity in the recipe, because friends.

After 15 minutes of kneading, return the ball of dough to the bowl, cover with a damp tea-towel and take a break. You deserve it.

The dough now gets a very short bulk fermentation. When I make these with yeast, I follow the instructions and give about an hour. Yesterday, with a leaven, I extended that to an hour and a half, and it was probably a little long. An hour will do it.

Preheat your oven to about 220°C. Prepare baking trays. Pour your chosen seeds, if any, into a saucer.

Shortly before the time is up, bring a large pot of water to the boil, adding two heaped tablespoons of brown sugar.

Weigh the dough and decide how many bagels you want; I generally go for 13 at about 120 gm each. Scale all the individual bagels first, leaving them on the counter. I’m not brilliant at judging dough by eye, so at this stage each bagel is a pile of bits of dough. I give each pile in turn a quick roll on the counter to amalgamate the bits.

Now use both hands to roll each ball out into a snake, slightly tapered at the ends. You are also pressing down the dough, so the bagels aren’t light and airy. My trays fit six bagels, so I do them in batches of six.

When you have rolled all the snakes, form the bagels. Just grab the snake, wrap it around overlapping the two ends and squeeze them together. It isn’t super easy, but you’re not baking for looks alone. Drop the bagels into the actively boiling water. I do it in two batches of three; you don’t want to crowd the pot.

After about a minute, they may float to the surface. If not, gently loosen them from the bottom of the pot with a fish slice or similar. When they float, they’re done. Lift them out of the water and onto a grill.

Carefully — they are hot and squishy — lift them off the grill and onto the saucer full of seeds. Place them on the baking sheet, seeds uppermost, and slide them into the hot oven for 20 minutes. Rotate after the first 10 minutes. The first batch may need a couple of minutes more if the oven is not fully preheated.

And there you are, proper bagels. Knowing how hard you worked kneading the dough, you can indulge yourself when the time comes to eat them. Let me know how you get on.

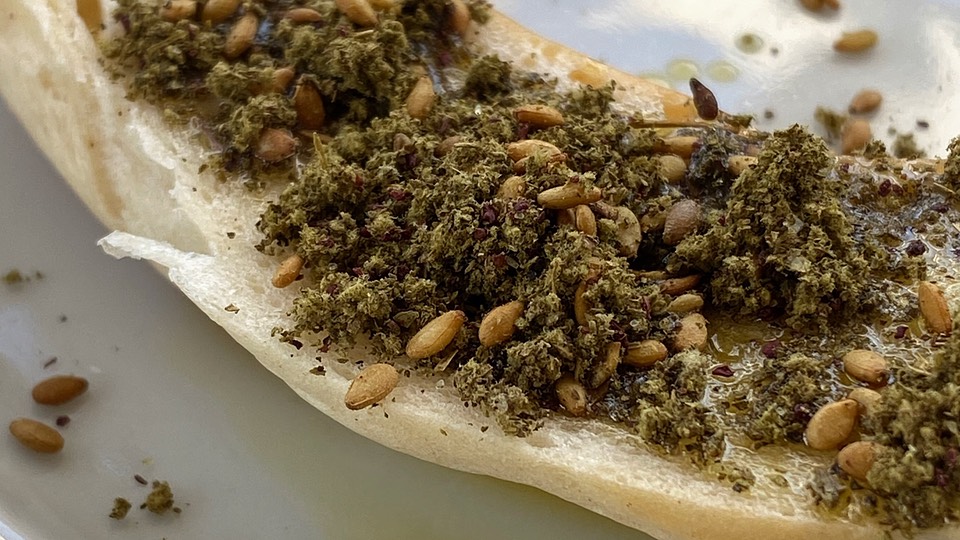
A bagel sprinkled with olive oil and za'atar

And for breakfast this morning, a bagel sprinkled with olive oil and za’atar.

My thanks to Carol, aka Apprentice, who posted the recipe originally, and to all the people who make The Fresh Loaf such a friendly and useful place.
I have not made pizza since moving to Rome a long time ago. Well, why would I? With all the pizza places shut, however, there’s only one way to get a pizza. Make it.

In this I was inspired largely by my friend Dan’s family-friendly pizza, adapted to my own preferences. The first of those is to use one of my standard leavens. I chose the wholemeal one, because it offers an easy way to have one-third of the flour be wholemeal.

Friday evening, 10:00 pm, I fed the starter with 75 g wholemeal and 100 g water.

I reckoned I would need 600g of dough for my tray, which is about 28 x 40 cm, at 70% hydration. So:

  • 355 g flour
  • 245 g water
  • 7g salt, and
  • 20 g olive oil.

Dan uses one third each of strong flour, all-purpose flour and light spelt. My wholemeal is pretty strong, so I went for 100 g each of wholemeal (in the leaven) and strong flour and 155 g of all purpose.

Saturday morning, 11:45 am, I removed some starter for next time and mixed the leaven up with the remaining water (170 g) and 100 g of all purpose flour to make a sponge, which I covered with a plate and left on the counter to do its thing for about 4 hours.

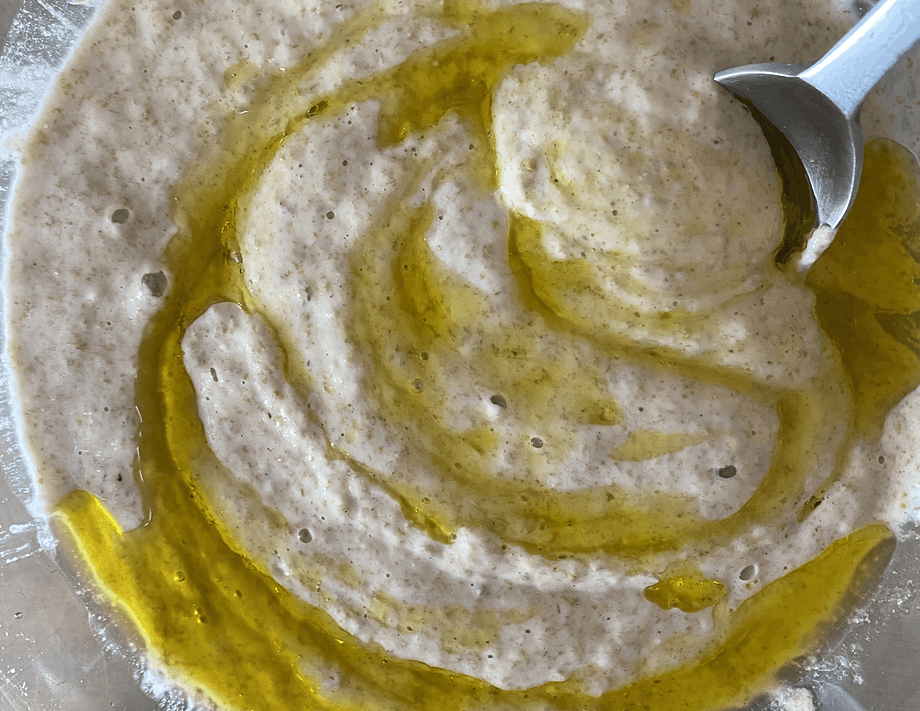
Saturday afternoon, 3:30 pm, with the sponge bubbling a bit, I poured about 20 g of olive oil on top and mixed it in with a spoon.

Pizza dough leaven with swirl of olive oil

Add the rest of the flours and the salt and stir roughly about until you can tip it out onto the counter. I shove it around with the heel of my palm to bring it all together then scoop it up with a scraper and dump it back in the bowl.

At 10 minute intervals, I tip the dough out onto the counter, give it five or six quick kneads and return it to the bowl. Do that three times, after 10, 20 and 30 minutes. Then leave the dough to bulk ferment. I like to do some stretch and folds each hour thereafter, with coil folds to finish the second and third sets.

Saturday evening, 7:15 pm, and it’s almost time to eat, so I fire up the oven to max. I think it reaches 240°C. Who knows? Dan rolls his dough, but he knows what he’s doing. I prefer to stretch by hand, tackling it over three or four sessions to allow the dough to relax a bit between each stretch. Manual stretch also allows me to make the crusts a little bit thicker.

After the first stretch, I start the sauce. Half an onion and a clove of garlic, thinly sliced, sprinkled with a pinch of salt and sweated gently in a little olive oil for about 5 minutes. Then I add a good grinding of hot pepper flakes, a can of peeled tomato bits and a good teaspoon of dried oregano. Bring to the boil and then turn the heat down low.

Time to stretch the dough out again.

While it is relaxing again, and the sauce is simmering, I slice the fresh tomatoes and the mozzarella. Then a final stretch of the dough, this time into the pan. It has a slight lip, which is great because if necessary you can flip a bit of the dough over the edge to stop it stretching back.

The sauce comes off the heat and gets whizzed with an immersion blender. By now the oven has been preheating for about 40 minutes and is plenty hot enough. So I construct the pizza, trying to spread the sauce evenly but not too deeply and then arranging mozzarella and tomato slices on top. Although we had no basil, we did have a bit of fresh marjoram, so a few leaves went on too. Then some black pepper and a quick spurt of oil and into the oven.

Assembled raw pizza with mozzarella and fresh tomato on a tomato sauce base

About to go into the oven

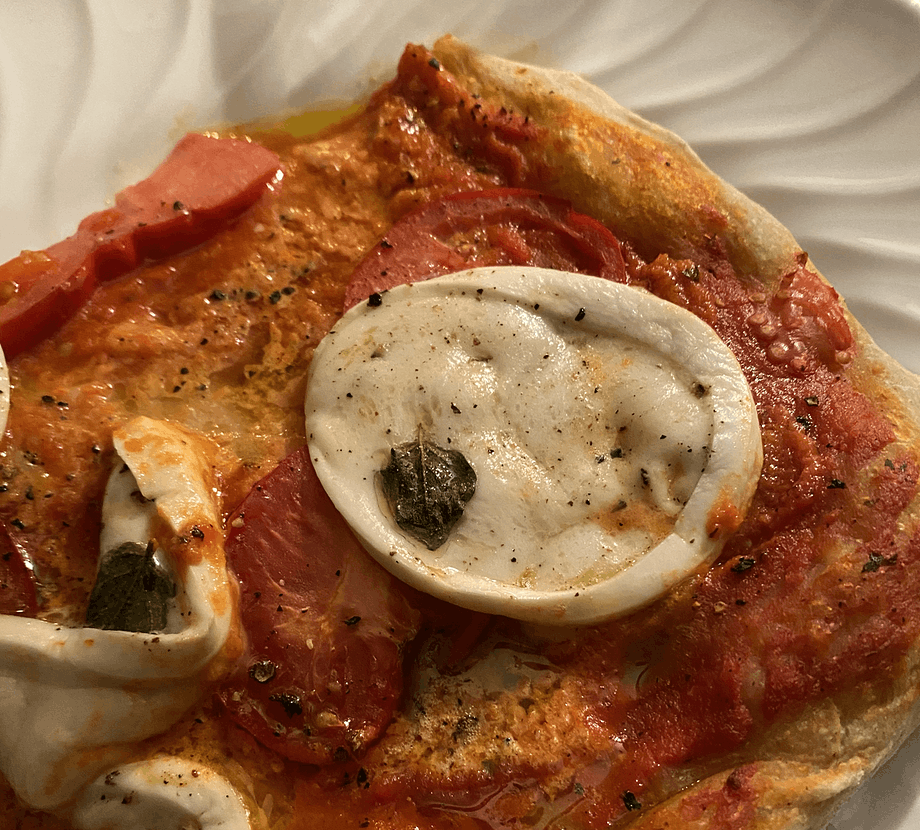
Pizza with mozzarella and fresh tomato on a tomato sauce base

Straight out of the oven

I rotate the pizza through 180° after about 9 minutes, and take it out after 15 minutes. Scissors, I’ve learned, are far and away the easiest way to cut portions, the remainder going back into the oven, now off, to stay warm.

Slice of pizza with mozzarella, fresh tomato and tomato sauce base

Ready to eat

And though I say so as shouldn’t, it was very, very fine.

What would I change? Definitely cook the sauce a little longer on a higher heat to thicken it a bit more. Maybe only 500g of dough, although then stretching it to fit without tearing it might be an issue.

Twice a week, I wake my starters from their frigid slumbers and feed them up so they are ready to leaven my bread. Different people evolve different procedures that suit their way of working. Here’s mine.

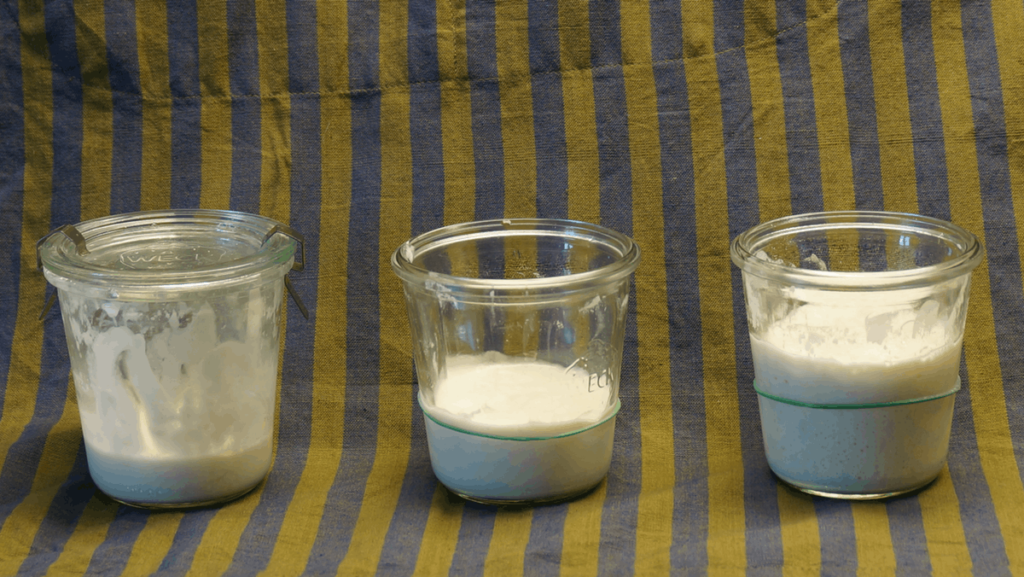
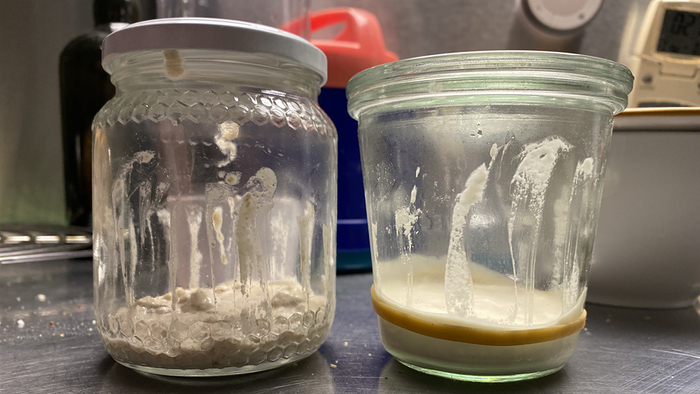
starter workflow, left to right. The original, freshly fed, active

Starter workflow, left to right. Original, freshly fed, active.

In the fridge I keep about 80g of the white starter, which I made myself more than 30 years ago, and about 40g of the wholemeal “100-year-old Tuscan” starter that was shared with me a decade or so ago. Two days before the bake, i.e. on Monday for Wednesday, I remove the jar of white starter from the fridge (that’s it on the left) and put 20g of it into a clean jar. I add 40g of water and 40g of flour, stir it up, scrape down the sides and mark the level with a rubber band. That’s it in the middle.

The next morning, it is good and active. If you look closely at the jar on the right, you can see it has actually fallen back a little from the high tide mark, showing that it is past its peak. I will now feed that again, and possibly a third time, to get the amount of leaven I need for the amount of dough I need to make.

The starter goes back in the fridge. The jar normally contains enough to create a leaven for four bakes. When I’m down to my last few grams, I do a couple of feeds specifically to build the starter, which then lives in the fridge.

For the white starter, everything is very easy because it is at 100% hydration, which means I add equal amounts of flour and water each time I feed it.

The brown Tuscan starter is a little trickier, because it is at 75% hydration. I begin with the whole 40g and add flour and water in the ratio of 4:3, which usually means 100g of flour and 75g of water for the first feed and 300g of flour and 225g of water for the second. At that point, I remove about 40g and pop it back into the fridge.

This is just my tried and tested approach. We discuss others during the one-day course in Rome. The next one is on 5 April at Latteria Studio.

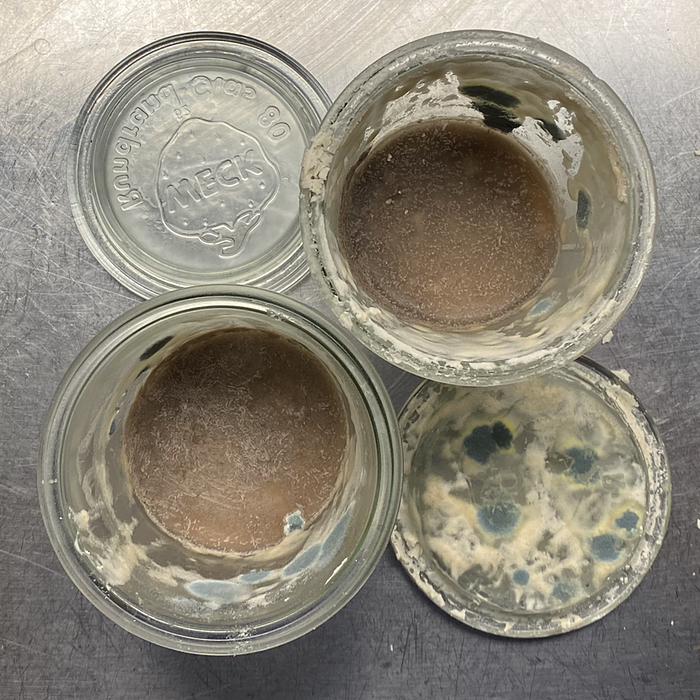
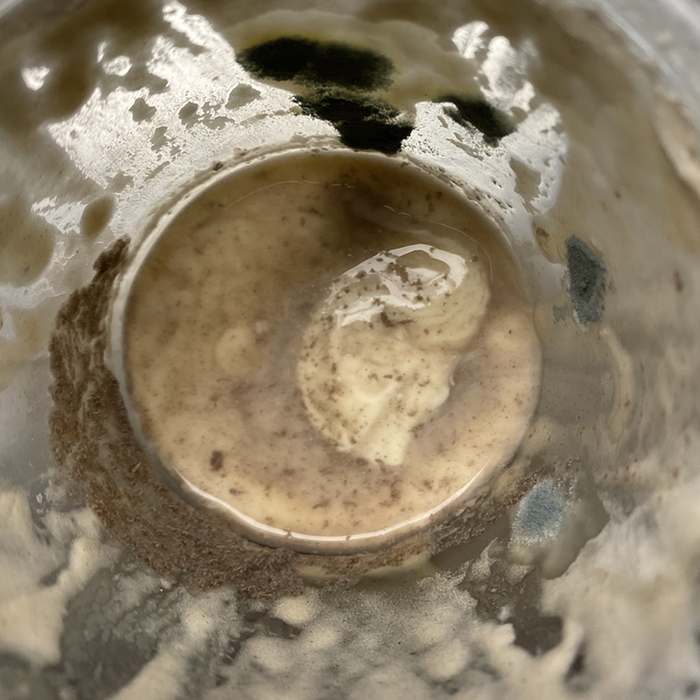
You open the fridge door after a longer-than-average absence and that smell hits you on the head. Oh no, my starters are dead. There are big patches of mold and a morbid layer of hooch smothering the starter. A beginner might wrinkle their nose and toss the lot. I’m here to tell you that it is actually quite hard to kill a starter outright, and relatively easy to bring it back to life.

Two jars of very dirty starter seen from above

Two very dirty jars of starter

The key is to start from a small amount and feed a couple of times in quite rapid succession. That gives the good micro-organisms a head start so that they can get going and recreate the conditions that keep nasty invaders out. But it is important to make the first few feeds quite small, so that you do not dilute the remaining acidity, because it is the acidity produced by the bacteria that favours the good and keeps bad bacteria at bay.

Close up of dirty starter with hooch removed

Hooch poured and scraped away to reveal cleanish starter

First, pour or scrape off as much of the hooch as you can, exposing the relatively clean starter below. Take a small amount of that starter, digging deep to get it from as far down as you can, and transfer it to a clean jar. Then feed with 1.5 times the weight of flour in the bit you rescued and the appropriate amount of water. A decent digital scale is essential.

This was my 100% hydration starter, equal weights of flour and water. I removed 8 gm of starter and fed with 6 gm of white flour and 6 gm of water. I also needed to bake some rye bread, so I did another rescue with about the same amount of starter, fed with whole rye flour.

Rye and white starters at the beginning of the rescue

Rye and white starters at the beginning of the rescue

Then into the oven with the lamp on, because the house was freezing when we got back. About six hours later there were definite signs of life so I gave another feed, this time of double the flour, so about 20 gm. Back into the illuminated oven overnight. Next morning they were both properly alive and kicking.

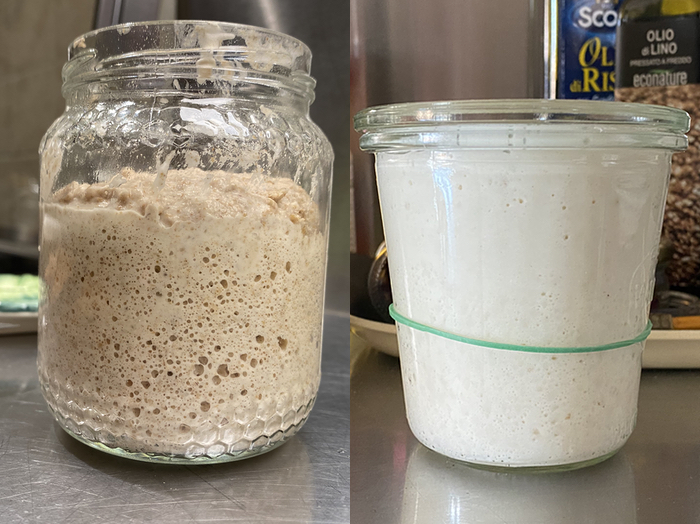
Both starters have filled their jars at the end of the second build

End of the second build, and both starters have filled their jars

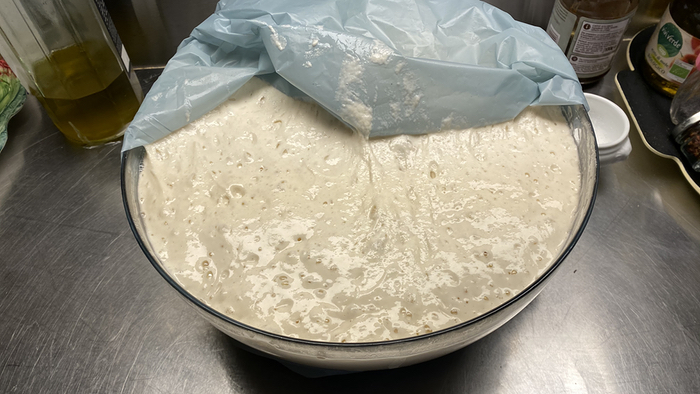
From there, it is business as usual, building the amount of leaven I needed to bake the loaves on order. After two more feeds I had about 2.5 kg of starter, almost overflowing the bowl.

Fifth build of the white leaven filling a large bowl

Fives builds later, 2.5 kg of leaven

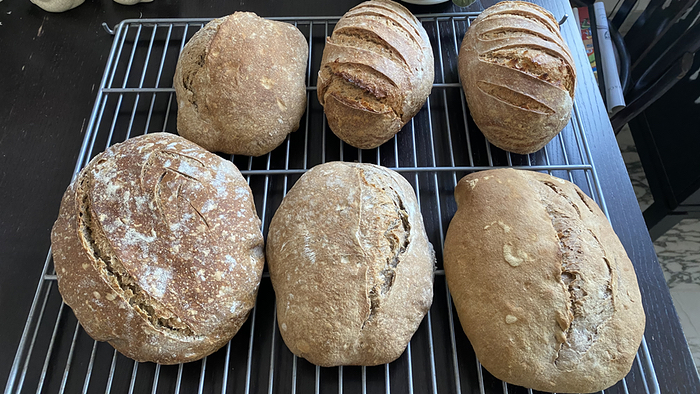
And that went to raise a large batch of loaves, only half of them seen here.

Two rye and four buckwheat loaves

Two rye, four buckwheat

The important part is not to lose faith. Start small, don’t overfeed, and keep the leaven nice and warm, and you’re almost guaranteed to bring your sourdough starter back to life.

And if it truly is dead, well, commiserations. Time to break out the safety stored in the freezer. You do have a safety stored in the freezer, don’t you?

I know I use the words sourdough, starter and leaven sloppily. I know which I mean when, but that doesn’t help people who are just beginning. So, I thought I would clarify with an example.

This week’s big bake will amount to 3 kg of dough, and my formula calls for 33% of that to be pre-fermented leaven. So, I need to build about 950 gm of leaven. For this particular bread, I always use the white flour starter that I keep at 100% hydration. I know that I’ve got about 100 gm of starter in the fridge, because I refreshed it just last week.

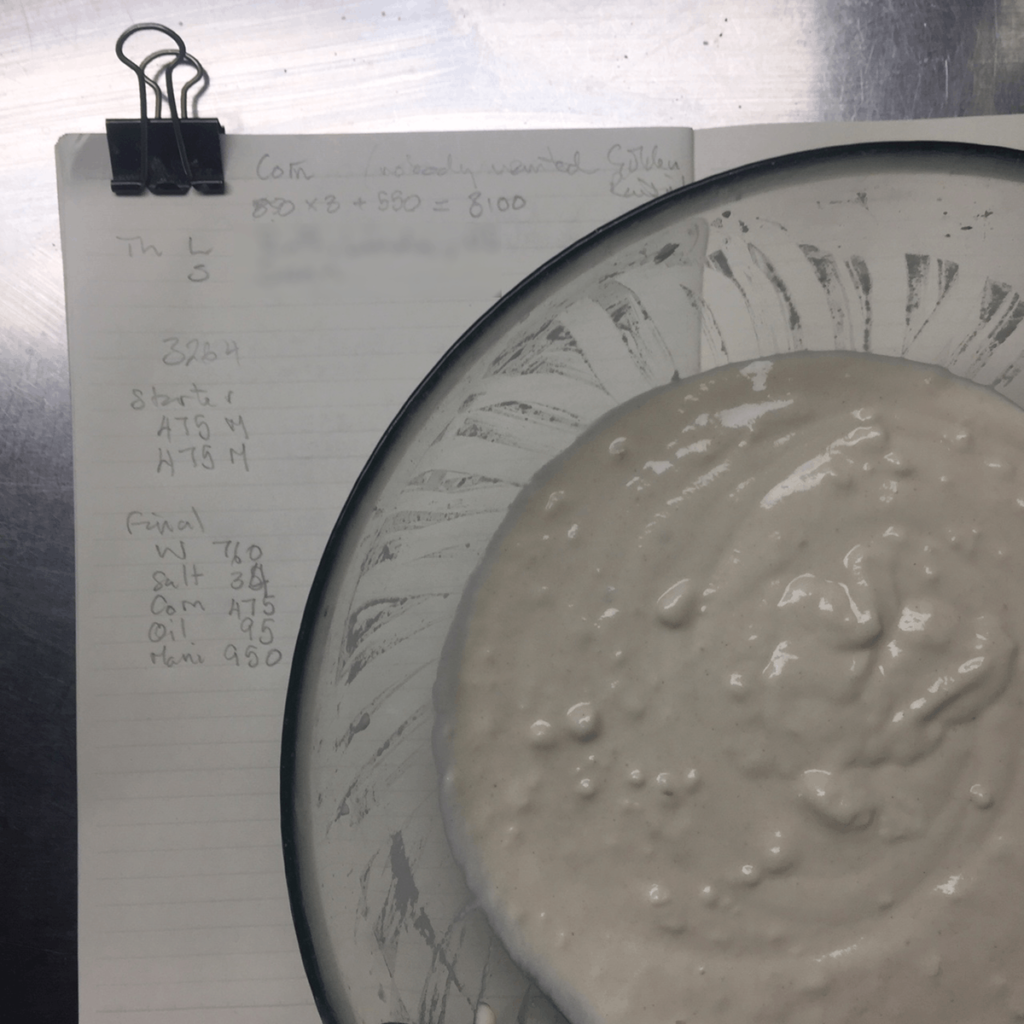
first build of sourdough leaven resting on notebook

Here’s the freshly mixed first build, resting on my notebook.

So, I remove 75 gm of the starter and mix it with 150 gm of flour and 150 gm of water. 1:2:2 in ratio terms. That keeps the hydration at 100% and does not give the starter too much to chew on as it becomes the first build of leaven.

At the same time, I now have only 25 gm of starter left. I could leave it at that and stick it back in the fridge, but I refresh that too. That means adding 50 gm of flour and 50 gm of water, exactly the same ratios as the first build.

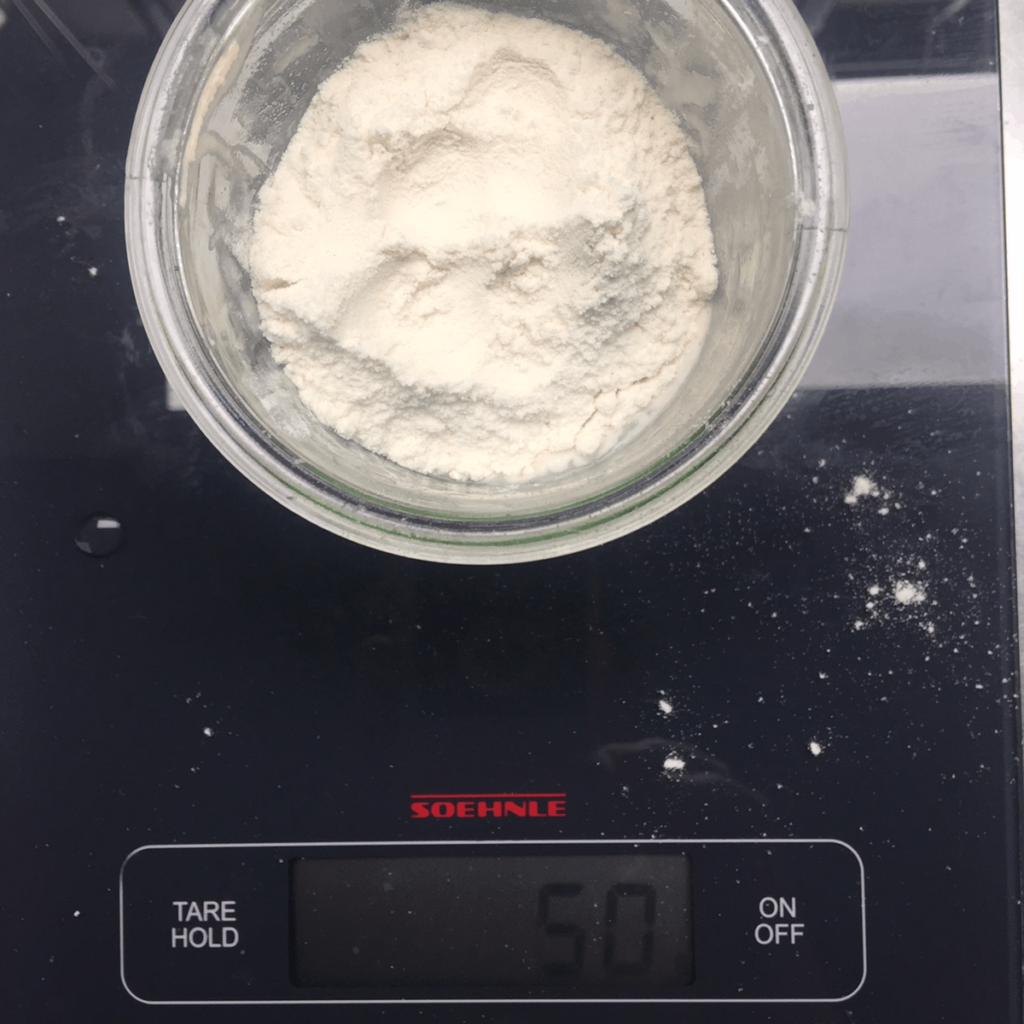
Starter with fresh flour on a digital scale

The starter, refreshed with 50gm of water and 50 gm of flour.

Both of them will stay out now for about 12 hours; it is getting cold here. Then this evening, the starter will go back in the fridge. The first build, which currently weighs 375gm, will get 290 gm of flour and 290 gm of water, takings the amount of the second build up to 955 gm, which gives me a slight excess to work with.

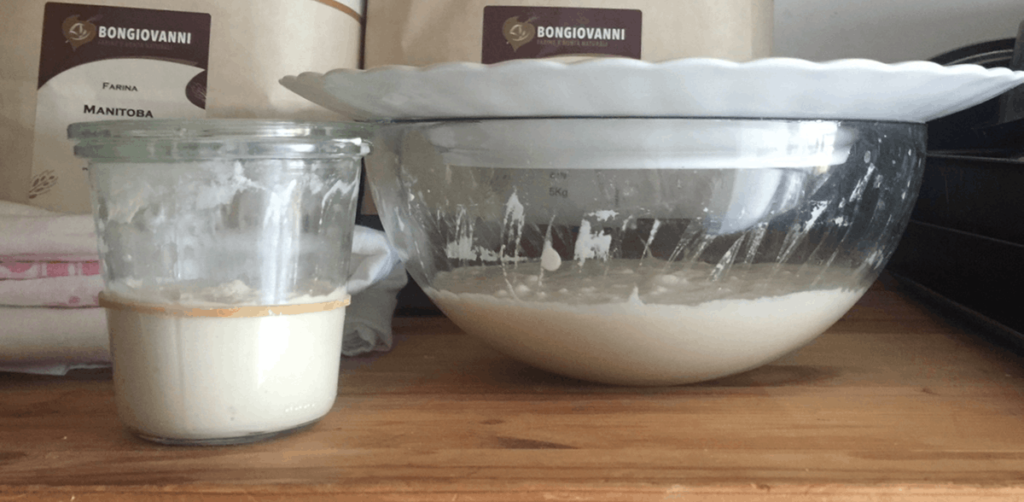
starter and leaven set aside for the bacteria and yeasts to multiply

The refreshed starter and the first build of the leaven will now rest for about 12 hours.

Tomorrow, I’ll use all the leaven to raise the sourdough, which won’t be at all sour.